Create Digital Ocean Droplet
One of the tasks of wrapping up my last project was to write up some documentation on how I created the D.O. Droplet and configured the server. The project was a fairly simple Craft CMS site, so nothing crazy complex there. But I also added some notes on protecting important bits like database passwords by storing them in the apache config.
Create SSH Keys before creating a Droplet
Create your SSH keys before you create the droplet. This will allow you to easily add the keys when creating the droplet. Create SSH Keys
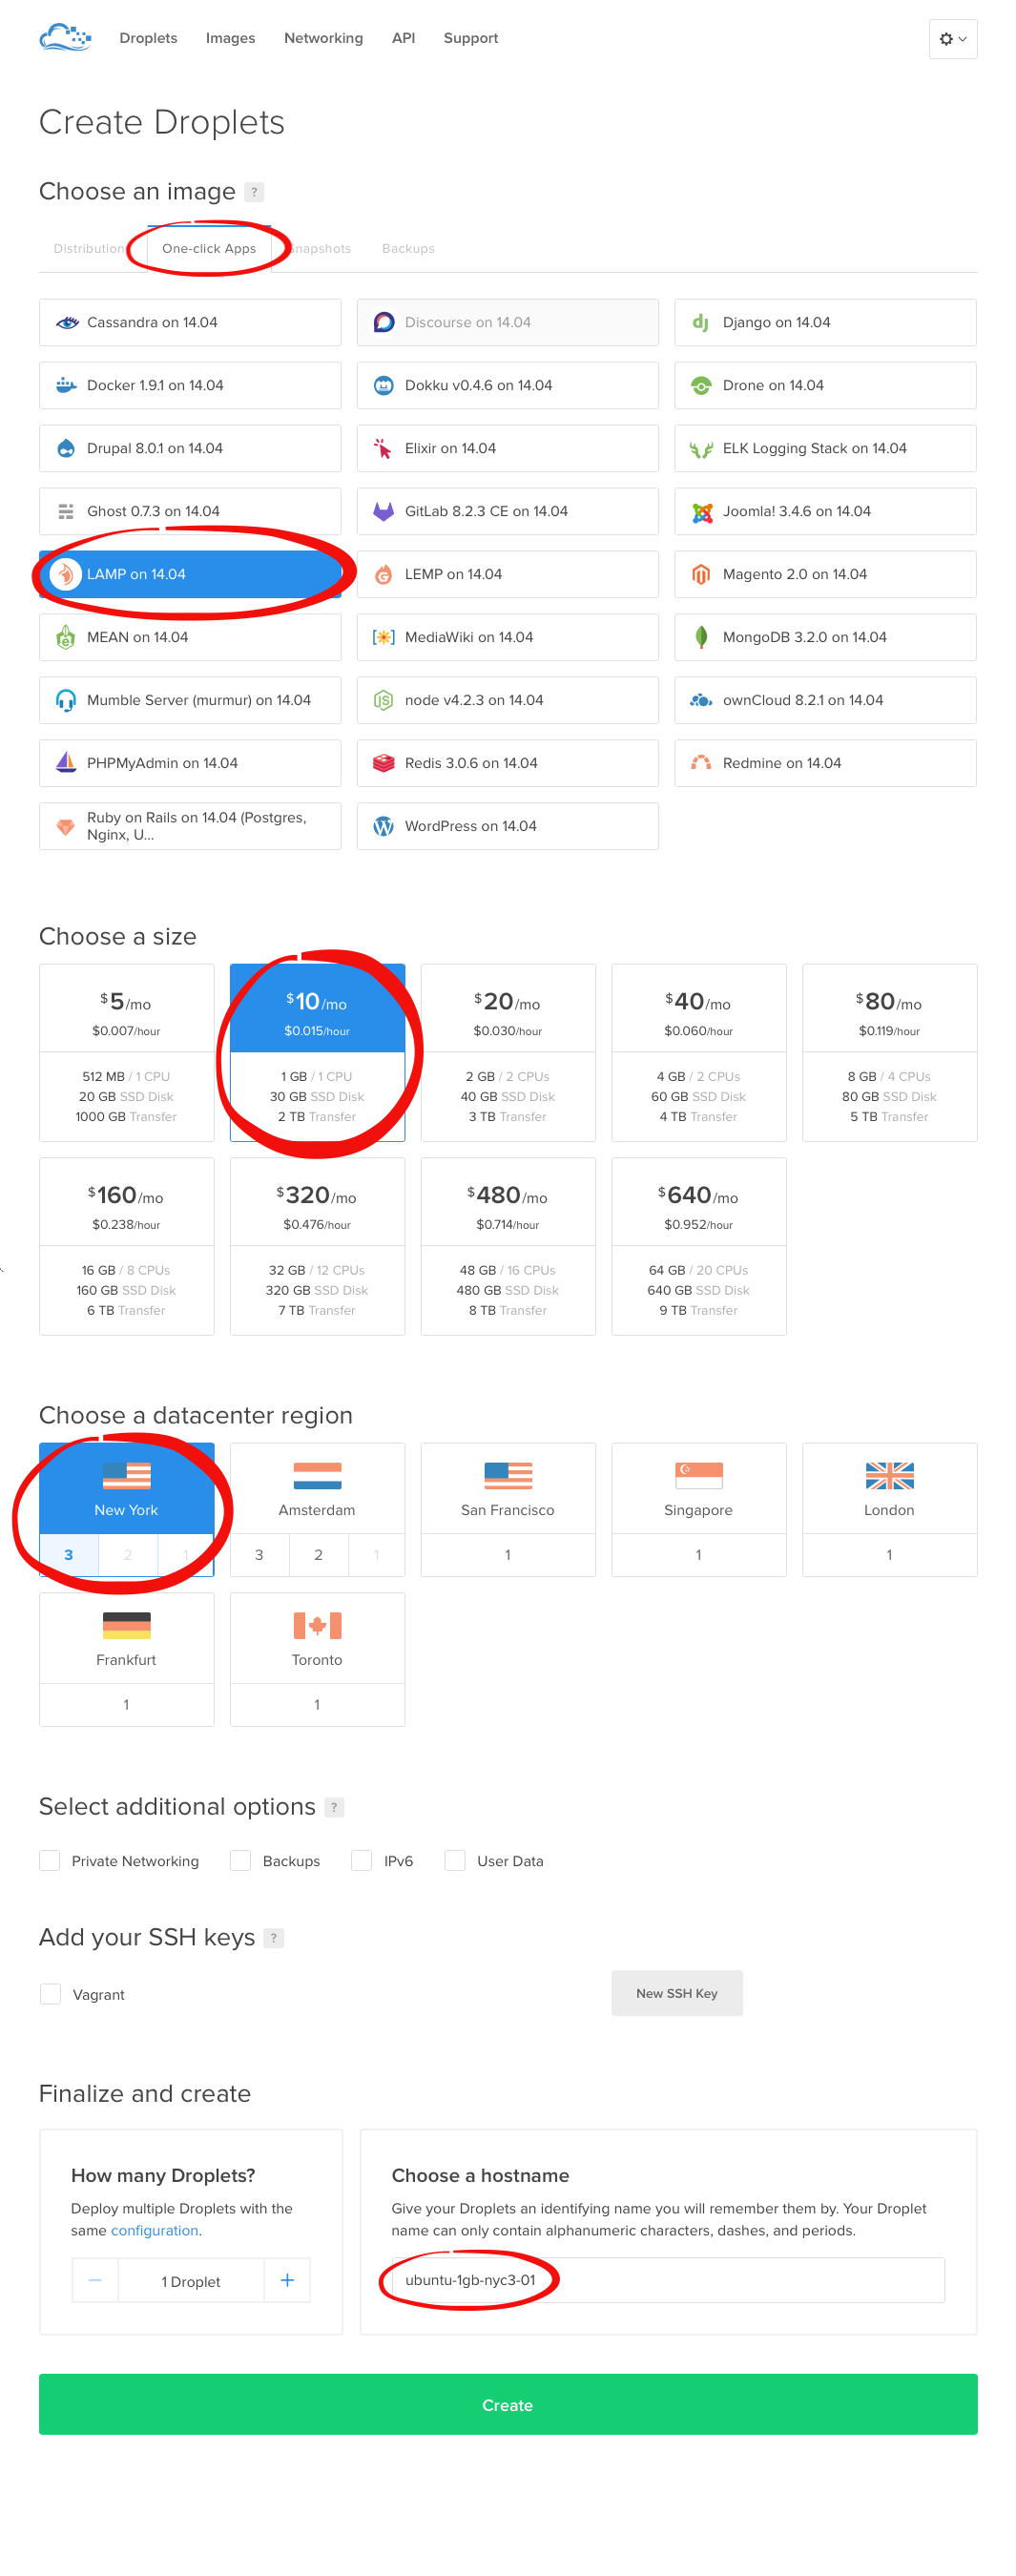
Create a Droplet
Use the One-click Apps setup for the primary stack (LAMP, MEAN or Ghost) which installs the apps, creates the appropriate users (e.g. www-data or web-user) and sets up the directory structure. Then add secondary apps via apt-get, npm and gem etc.
Digital Ocean’s Guides
How To Create Your First DigitalOcean Droplet Virtual Server Video: How To Create a Cloud Server on DigitalOcean
Screenshot of droplet config (Steps 1-8)
Screenshot of droplet config
Login to Server (Step 9)
In the console:
ssh root@droplet_ip_address
Secure Server
In step 6 of the How To Use SSH Keys with DigitalOcean Droplets guide it describes how to lockdown the server by disabling login with password and allowing only SSH keys.
In /etc/ssh/sshd_config change to:
PermitRootLogin without-password
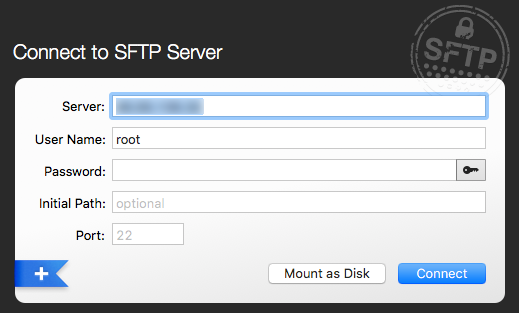
Login via SFTP
Using Transmit
Enter the IP address and username (e.g. root).
Leave the password field empty to let Transmit use the ssh keys.
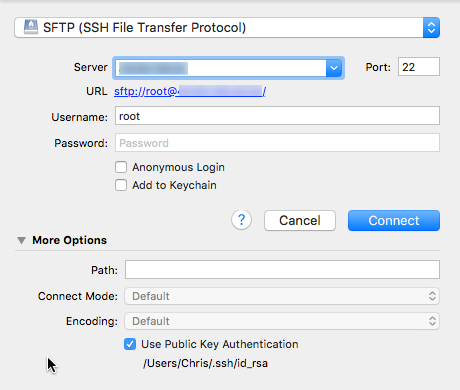
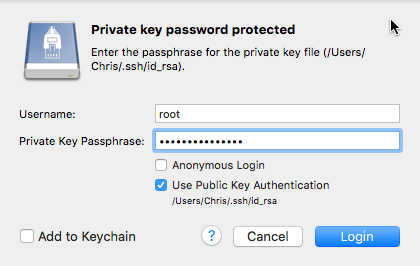
Using Cyberduck
Login to server as root and the SSH passphrase as the password.
Cyberduck login screen
And Cyberduck SSH Private Key Passphrase screen
Virtual Host Config:
Config Virtual Hosts in Apache. From the documentation: “If no matching ServerName or ServerAlias is found in the set of virtual hosts containing the most specific matching IP address and port combination, then the first listed virtual host that matches that will be used.” So be sure to list the Production Server first
How To Set Up Apache Virtual Hosts on Ubuntu 14.04 LTS
In /etc/apache2/sites-available/example.com:
##
## Production
##
  <VirtualHost *:80>
    ServerAdmin admin@example.com
    ServerName  stage.example.com
    ServerAlias staging.example.com

    # Index file and Document Root (where the public files are located)
    DirectoryIndex index.php index.html
    DocumentRoot /var/www/example.com/public

    # Log file locations
    LogLevel warn
    ErrorLog  /var/www/example.com/log/error.log
    CustomLog /var/www/example.com/log/access.log combined

    # Use environment variables to store passwords more securely
    SetEnv mysql.user "webuser"
    SetEnv mysql.password "password"
    SetEnv mysql.database "database"
</VirtualHost>

<Directory "/var/www/example.com/public">
    Options FollowSymLinks
    AllowOverride All
    Order allow,deny
    Allow from all
</Directory>
Helpful Commands:
start, stop, restart, reload etc…
Usage: apache2 start|stop|graceful-stop|restart|reload|force-reload
service apache2 restart
Apache config test
apachectl configtest