Editing code in a Docker Container
There seems to be a lot of confusion about the best way to edit code in a Docker Container. Below is a step-by-step on how I’ve setup my environment.
A bit of context. There are basically 3 ways to edit files in a container. You can install an editor like Vim in the image so you can edit the files, but I’m not hip enought to use Vim. Or you could install a SSH server and ssh into the container but that breaks the idea of one service per container. Finally, you can bin-mount the source directory of the app in the container to a copy of the source locally.
We’re doing the last approach
So, this guide assumes you don’t have the source locally on your machine. Which, honestly, is pretty unlikely. Most of the time you’ll have access to the source from GitHub, BitBucket your company’s internal repo system. If you have the source locally, then simply skip the copy step and bind-mount your source.
Never-the-less, here we go…
Pull down image
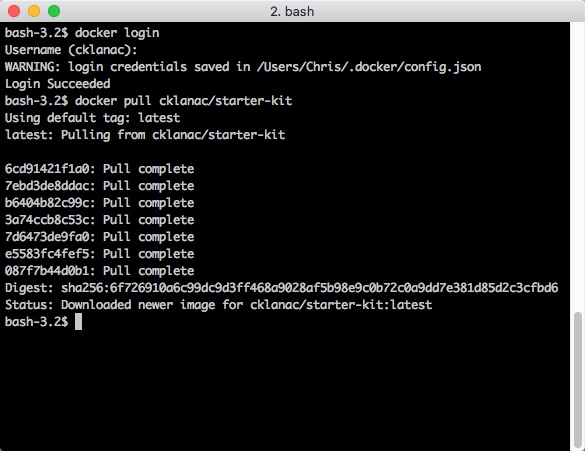
	docker login
	docker pull cklanac/starter-kit
Copy src from container to local drive (optional)
We’ll create a temporary container from the image. And then copy the source out of the container to our local drive so it will be easier to edit.
Create the container.
docker run --rm -p 3000:3000 --name starter-kit cklanac/starter-kit
Then open a separate terminal window. Using the docker cp utility we’ll copy the source from starter-kit:/src to a local directory ~/Code/starter-kit.
docker cp starter-kit:/src ~/Code/starter-kit
Finally, stop the container
docker stop starter-kit
Sidenote: Instead of copying the files from the container to local, we could bind-mount the local source to the
/srcdirectory in the container and runnpm installagain. But the container already has the npm packages from our image, so it seems a bit redundant. Anycase, if you want to do it that way, here’s how: 1. Create (run) a temporary container andnpm installto local docker run –rm -v “$PWD”:/src cklanac/gwsk npm install
- Then create (run) a container with source mapped to local directory docker run -d -v “$PWD”:/src -p 3000:3000 –name gwsk cklanac/gwsk
Create new Container with local source mapped to container source
Now we’ll create our working container running in the background as a daemon (-d flag) and our local source bind-mounted to the container’s application source (-v ~/Code/starter-kit:/src flag).
docker run -d -p 3000:3000 -v ~/Code/starter-kit:/src --name starter-kit cklanac/starter-kit
Point your browser at [http://
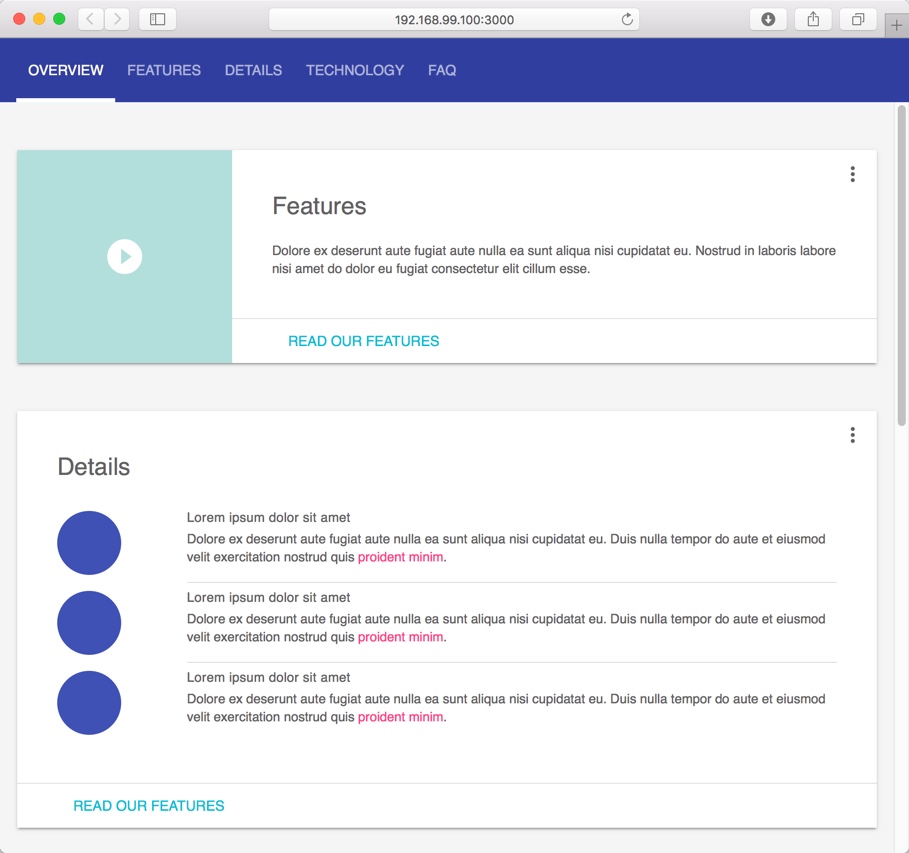
And for the cool part…
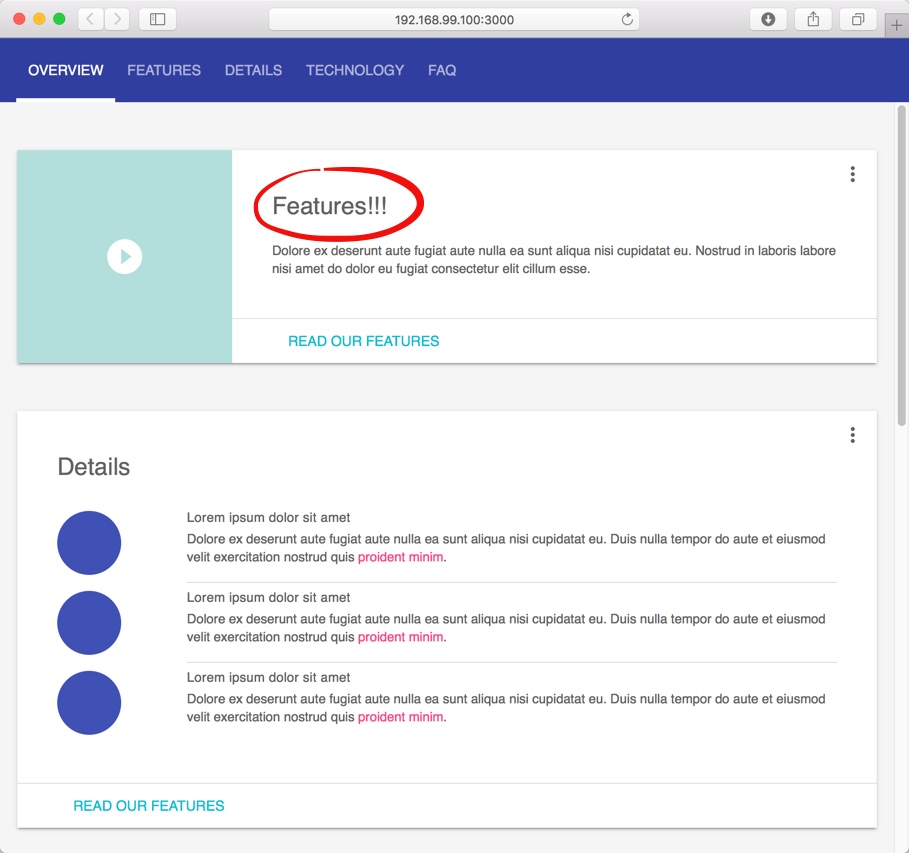
Open ~/Code/starter-kit/app/index.html in your favorite editor and update the “Features” title.
Features ==> Features!!
Save your changes and the gulp filewatchers in the Web Starter Kit will see the change, compile/transpile the changes and refresh the browsers via BrowserSync. Fun more fun open multiple browsers and make more changes, even scroll and click the nav.
:-) Build a new image based on update source
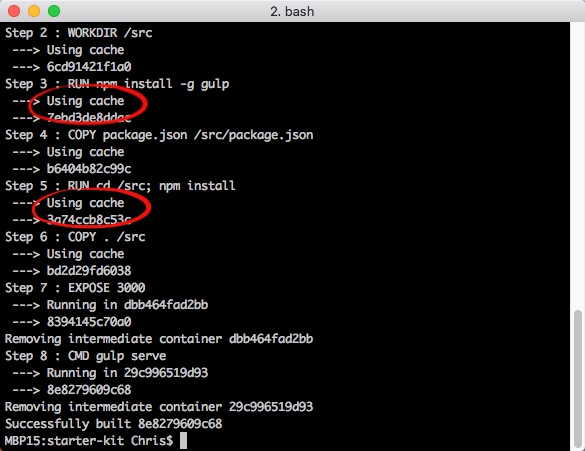
docker build -t cklanac/starter-kit:v2 .
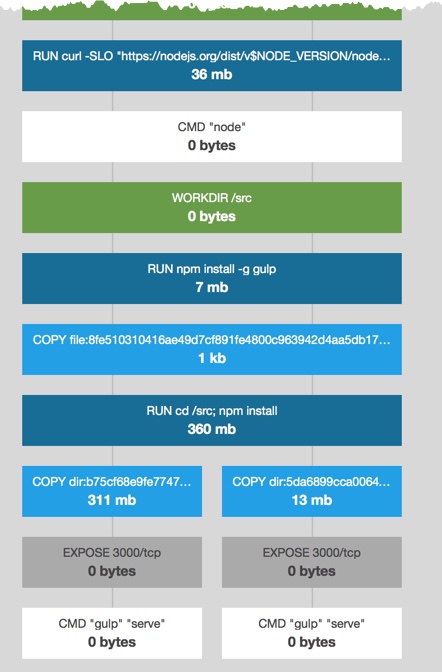
Notice the cache hits in the screenshot below, particularly Steps 3 and 5. Those layers are before the source layer and nothing changed so the build process uses the cached layers which is a bit faster
Push update image to Docker Hub
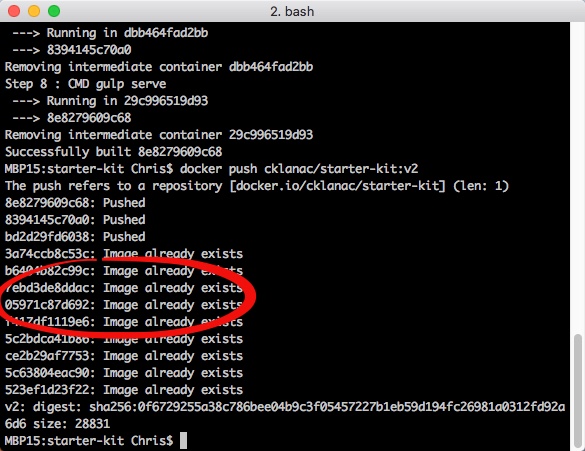
docker push cklanac/starter-kit:v2
Similar to the build process, the push process doesn’t need to upload layers that already exist in the hub. See the “Image already exists” on the screen shot below
Finally, to hammer the point home. Pull up the version on ImageLayers.com to see how Docker manages the image layers.